Export graphics
When it comes to exporting pages with graphics made from line-drawings, PDF Pro 2 needs to be told which parts of the page form the illustration. That is because there is no universal means of determining which parts of a page are an illustration and which parts are just normal page contents. For example, is the rectangle in the header on this page an illustration to be exported or just page furniture?
How to tell graphics from photographs
- Choose View > Outlines.
All images will be replaced by rectangles and graphics will be shown in outline only. It should then be more obvious what was an image and what was vector-based artwork. - Choose View > Outlines again to switch back to normal (preview) mode.
- You can quickly switch between the two views by double-clicking on the Preview label in the status bar.
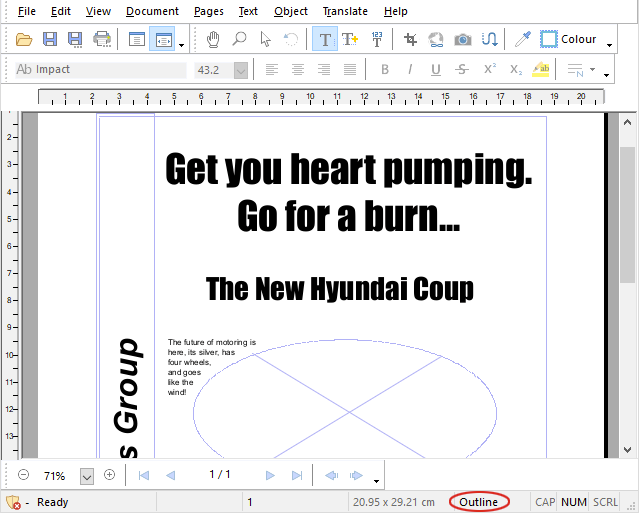
Double-click the circled area of the status bar to toggle between outline and preview mode.
Marking up an image for inclusion in exports
- Click the Link tool
 on the Edit toolbar.
 - Carefully drag out a box around the area to be exported.
Everything included within the rectangle you make will be rendered by PDF Pro 2 and included in the export. - After marking out the image, the Link Properties dialog box will appear.
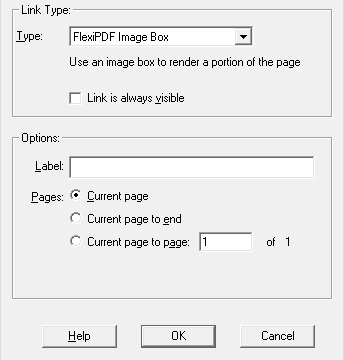
- Change the Type pop-up to Image Box.
- Enter a title for the image in the Label box. This is used during export to HTML-based formats.
- You can now choose to repeat this markup across a range of pages. This is useful if your document contains a similar image, repeated across several pages.
- Press OK.
- The area is displayed by PDF Pro 2 together with its label.
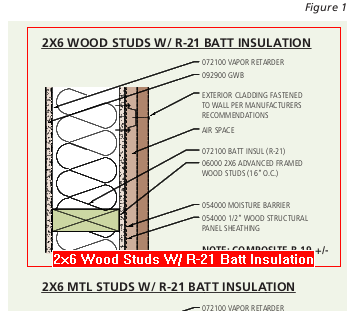
Example of an illustration marked-up and named with an image box. - When you next export the document or page, the illustration will be converted to an image and output along with the rest of the page.